Workflows, Best Practice guidance, Tips and Tricks to extract the best from Hammer Missions
Turning a 3D building outline into an automated façade flight mission is one of the quickest ways to prepare consistent, repeatable inspections. The core idea is simple: create the model, select the sides you want to inspect, let the system auto-generate the flight path, then tweak a few mission parameters before you fly.
After the building outline is created you can switch between a 2D plan and a 3D visualisation to check geometry and sightlines. Use the 2D/3D toggle (usually located in the top-right, below the location search) to confirm the model looks correct from all angles.
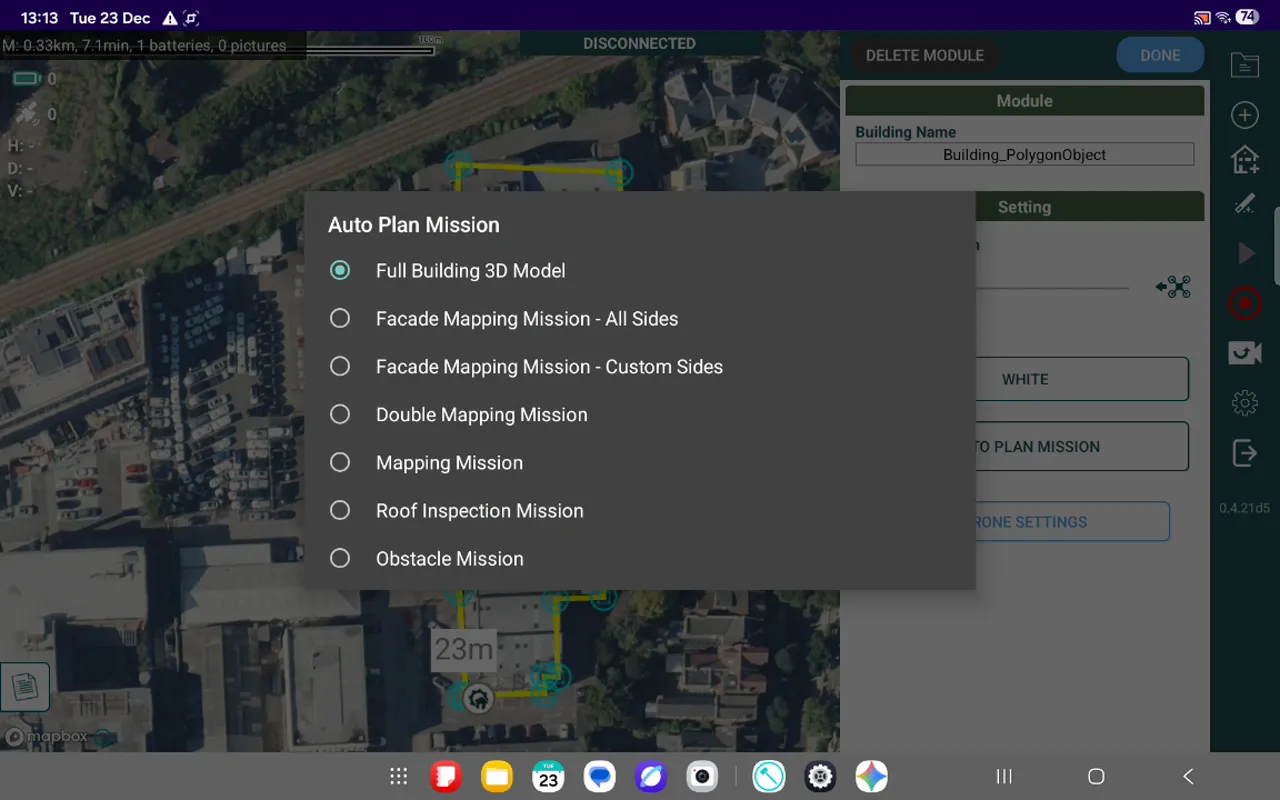
To create a mission associated with that outline, open the system menu via the cog icon and choose auto plan mission. This brings up a list of mission templates; for customisable building façades, select the façade mission (labelled custom sides) to pick which edges will be flown.
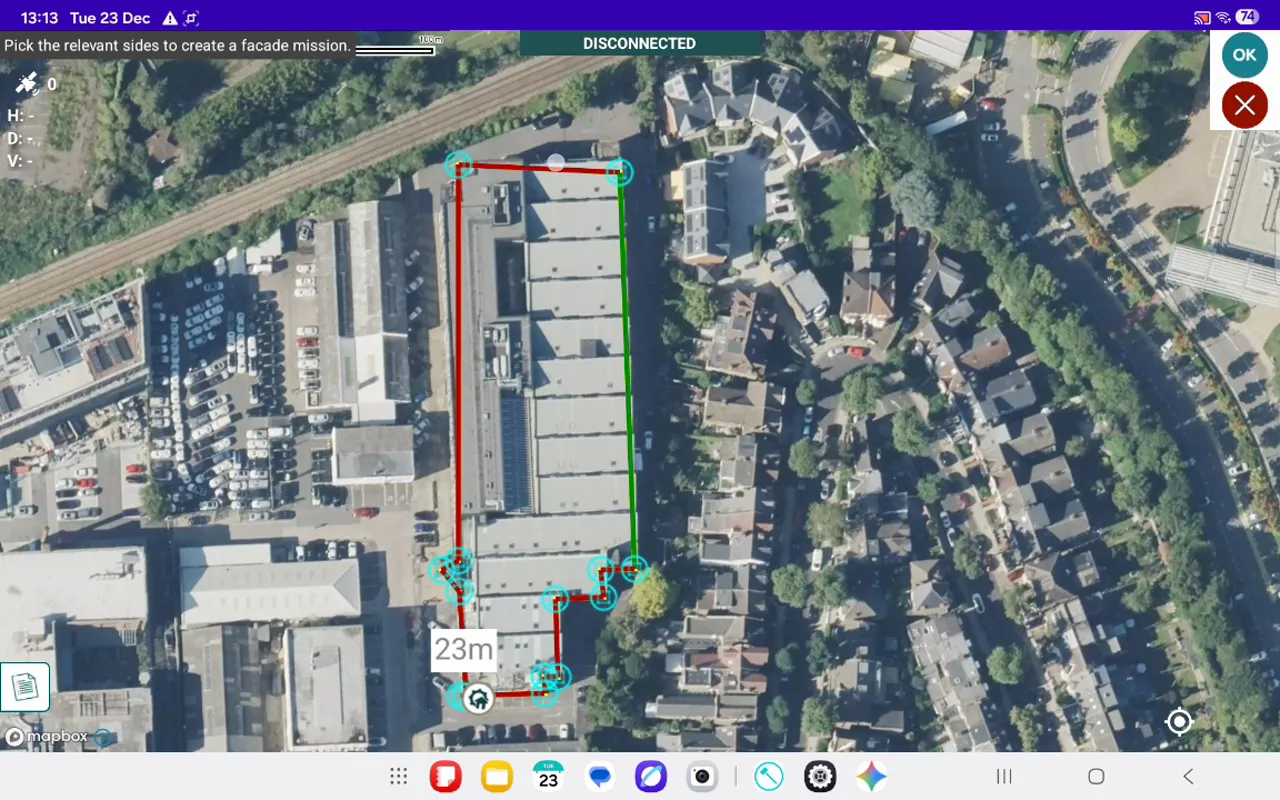
Click on the edge (or edges) of the building that you want to inspect. Once selected that edge will turn from red to green, the tool will auto-generate a façade flight plan for those sides. Review the proposed path and make sure it follows the areas you intended to cover.
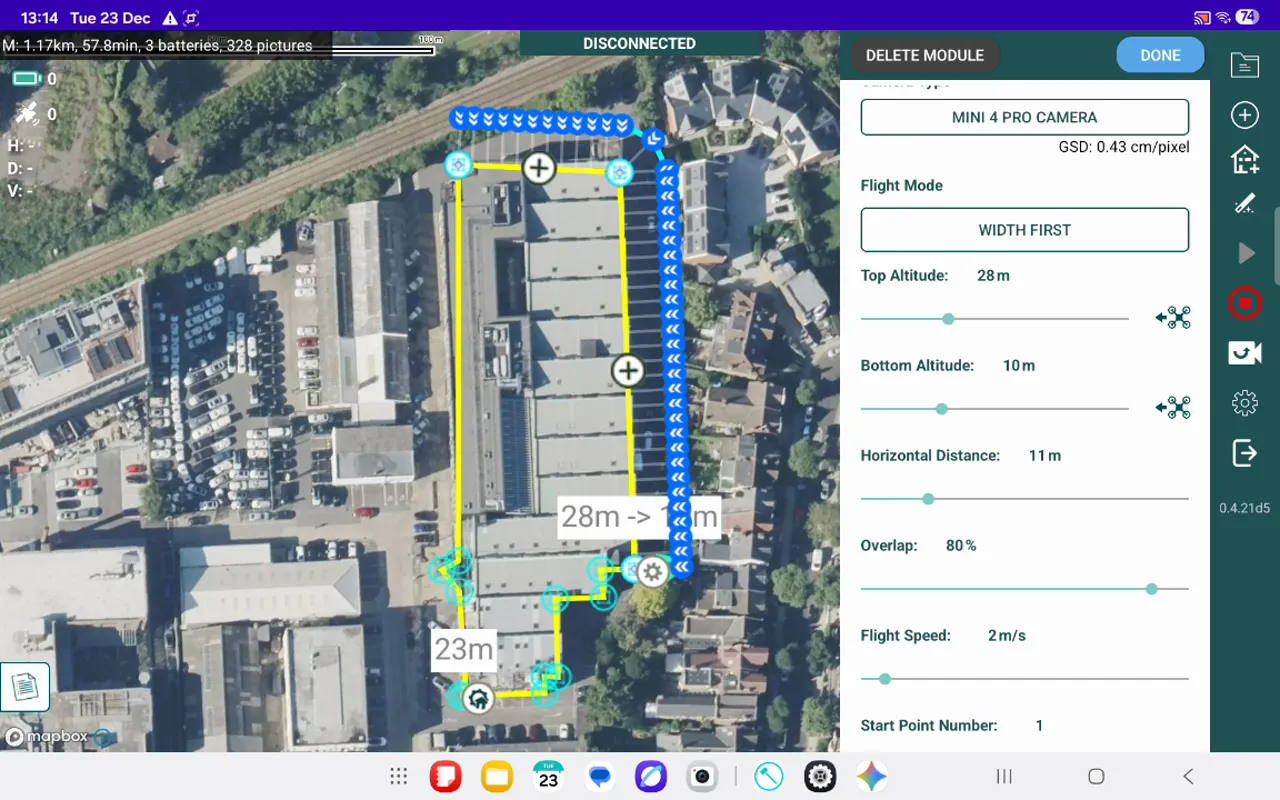
The auto-plan creates a basic route but you should always confirm and, where necessary, adjust the mission settings. The key parameters to check are:
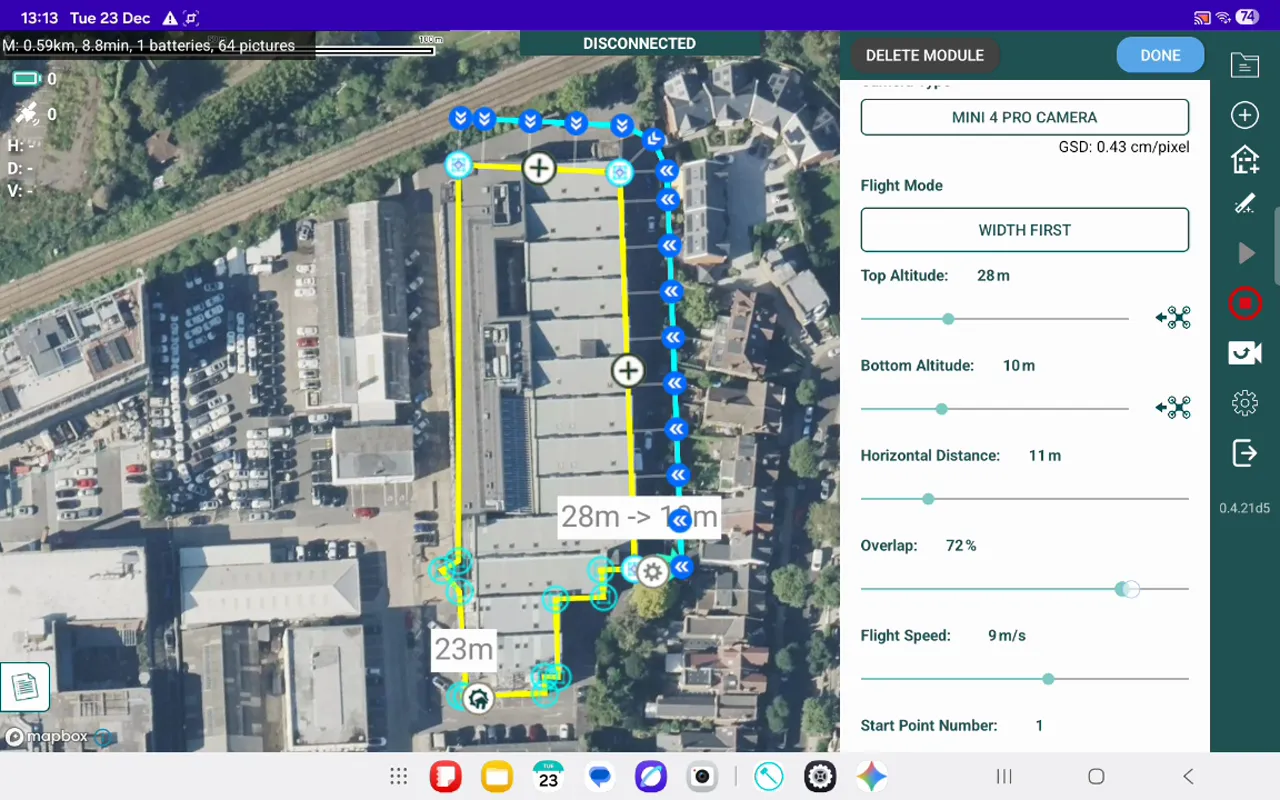
Increasing overlap to around 80% is common practice for façades. This improves stitching and helps when working on vertical surfaces with repeating patterns. Keep flight speed conservative: slower passes produce sharper images, and
"You should never go above the recommended flight speed."
If you prefer, reduce speed below the recommendation for extra image fidelity, but always balance this with battery life, mission execution time and any other operational constraints.
After you've adjusted the parameters and verified the route, click done. The mission will be saved and ready to execute. Once you have completed any relevant procedural/site checks, hit the white triangle in the right side panel and the Hammer Missions App will run through its required pre-flight checks.
Auto-planning a façade mission from a 3D building outline streamlines inspection work and standardises data capture. With a few careful checks — selecting the right edges, setting altitudes and distance, and choosing appropriate overlap and speed — you'll have a mission that's both safe and effective.
Manual Flight based Facade Capture: Practical Tips