Workflows, Best Practice guidance, Tips and Tricks to extract the best from Hammer Missions
This guide explains how to use the Hammer AI Annotation Assistant to help expedite the creation of your Hammer AI model, which then automatically searches your project for the identified deficiency, assisting you in documenting and quantifying an issue across your entire project model.
https://www.loom.com/share/735b144d830548e9b8fc3e7c53a4e36e
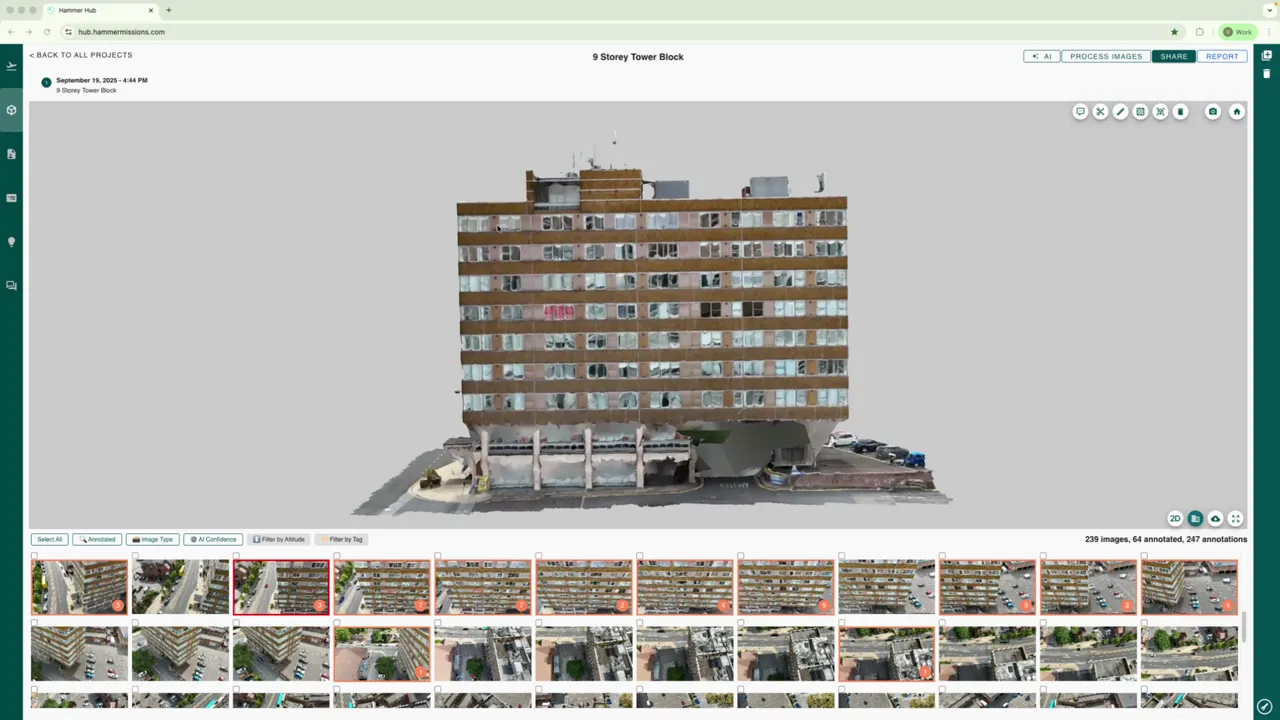
Start by orientating the 3D model so the elevation you want to inspect faces you squarely. Enable the facade lock so the view maintains orientation as you pan left/right or up/down.
With facade lock on, dragging the left mouse button keeps the perspective fixed rather than rotating the model. The view stability makes it much easier to perform a systematic top‑to‑bottom inspection.
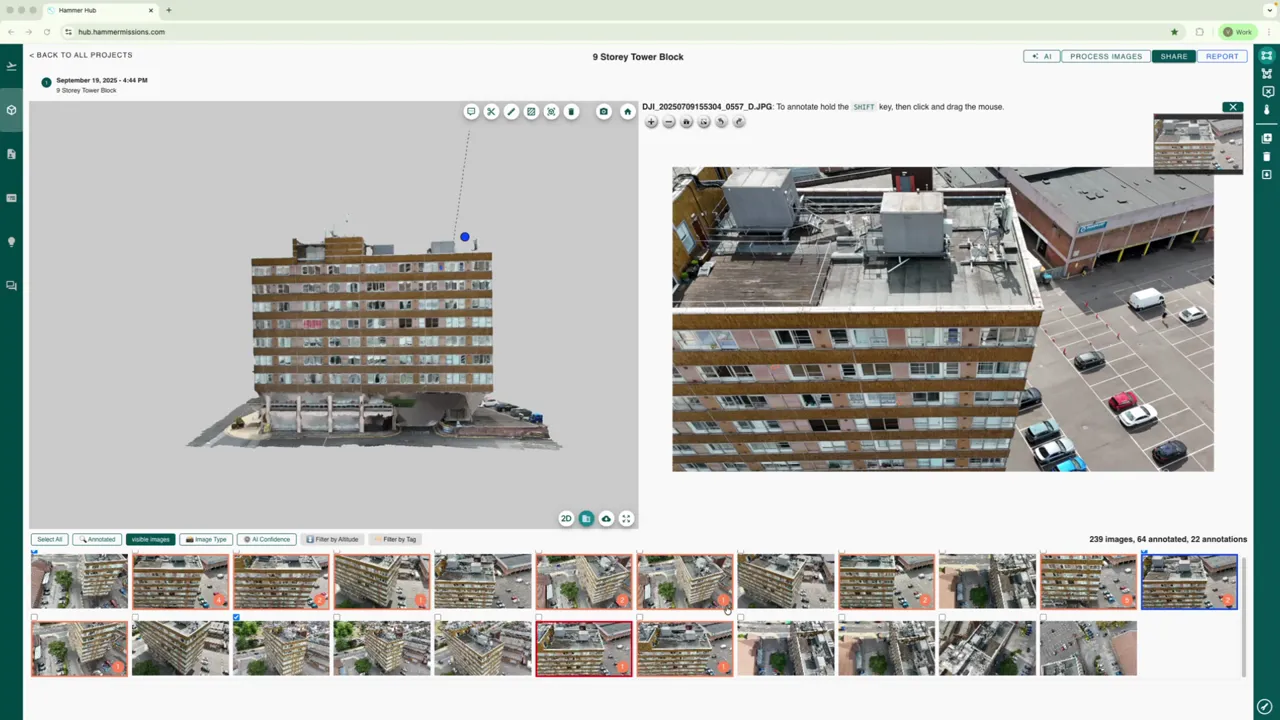
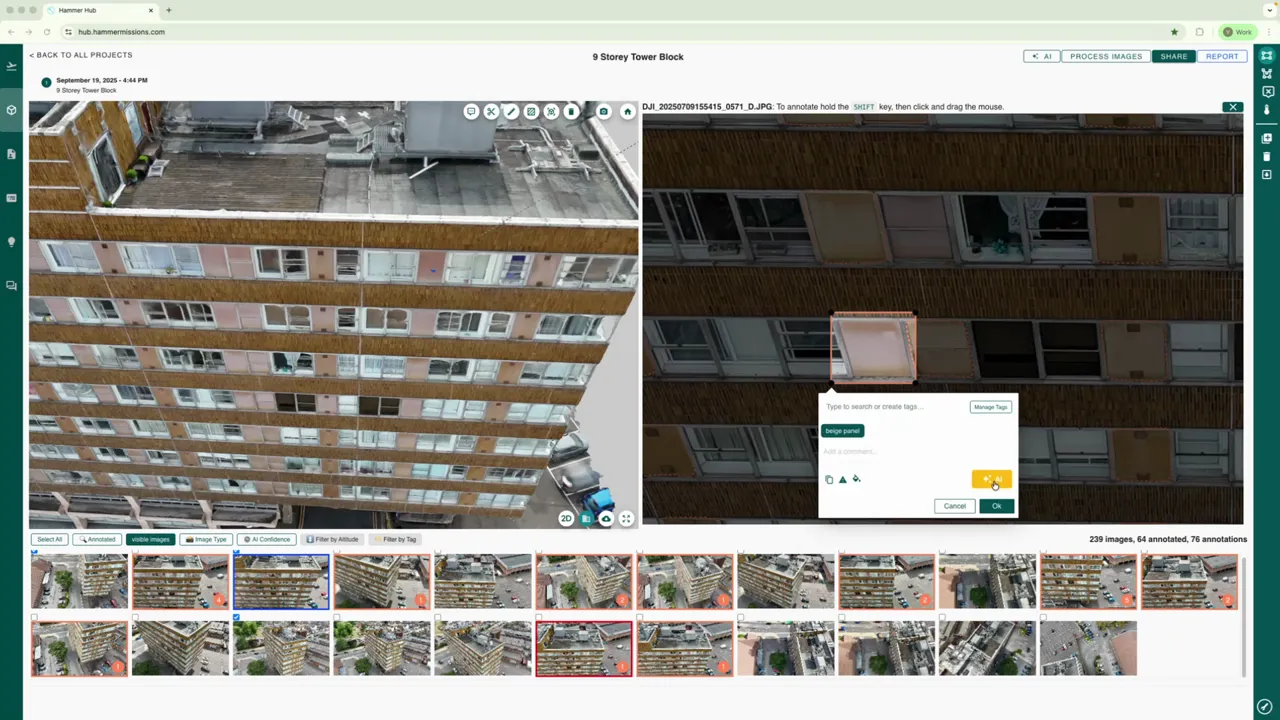
Mark the deficiency that you wish the AI model to identify, e.g. here we chose the beige panels on the facade. Double click the 3D model at the area of interest and then thumbnails for that area will appear in the bottom panel. Pick an image (with the deficiency visible) to work on.
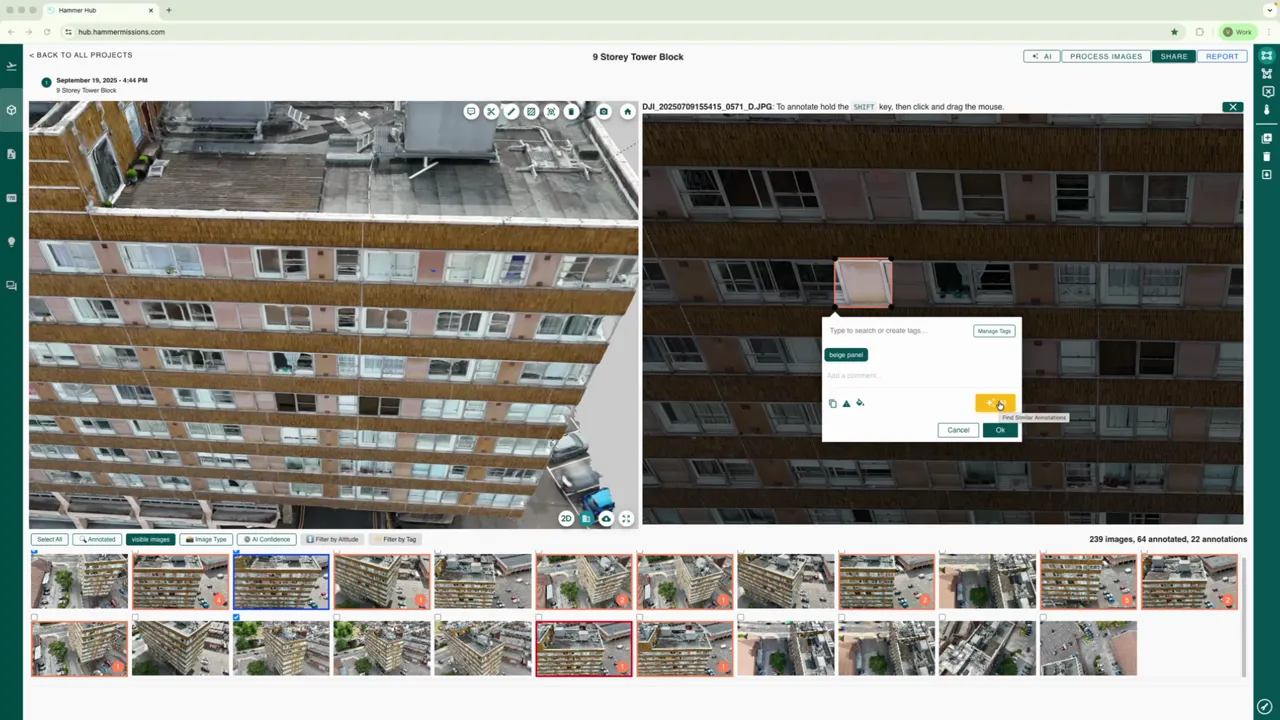
After labelling just one example of the deficiency, you can use the Hammer AI annotation assistant (the orange button) to automatically scan the current image, for other occurrences of that same issue. The AI annotation assistant automatically annotates all matches it has detected, so you save time by not having to draw a box around every deficiency manually.
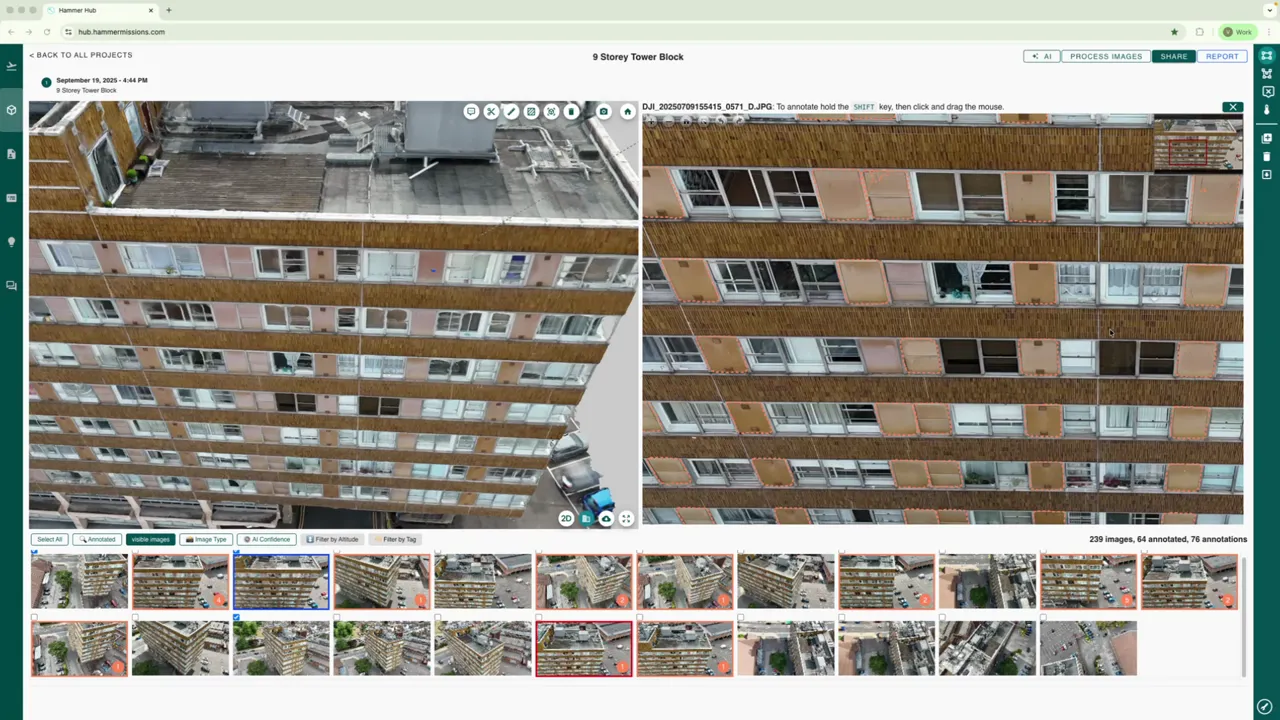
The AI annotation assistant can occasionally miss a deficiency, if that happens, jump to the missed area and draw another bounding box, assign the same label and re-run the assistant for that image. Repeat this annotation process across several images—aim for at least six distinct images containing the specific deficiency you need to identify.
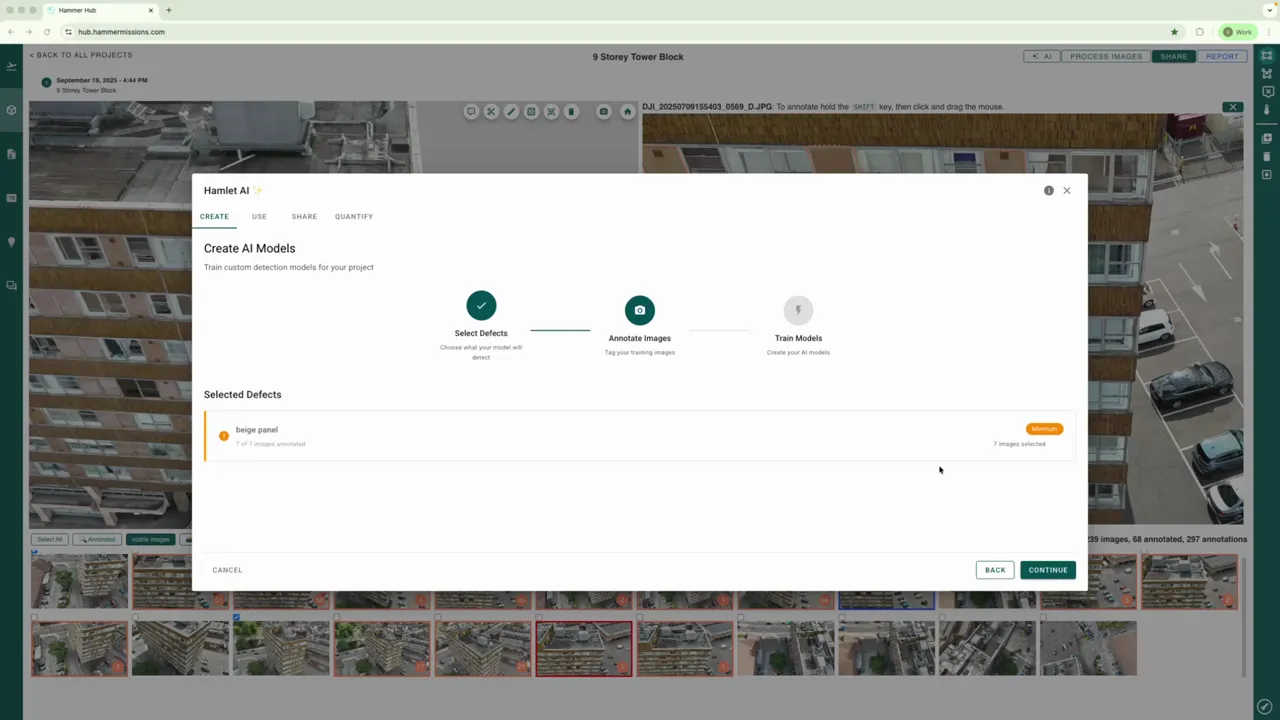
Once you have annotated enough examples, open the AI menu in the top right and choose Create. Select the annotation tag you annotated your deficiencies with (for example, beige panel) and continue.
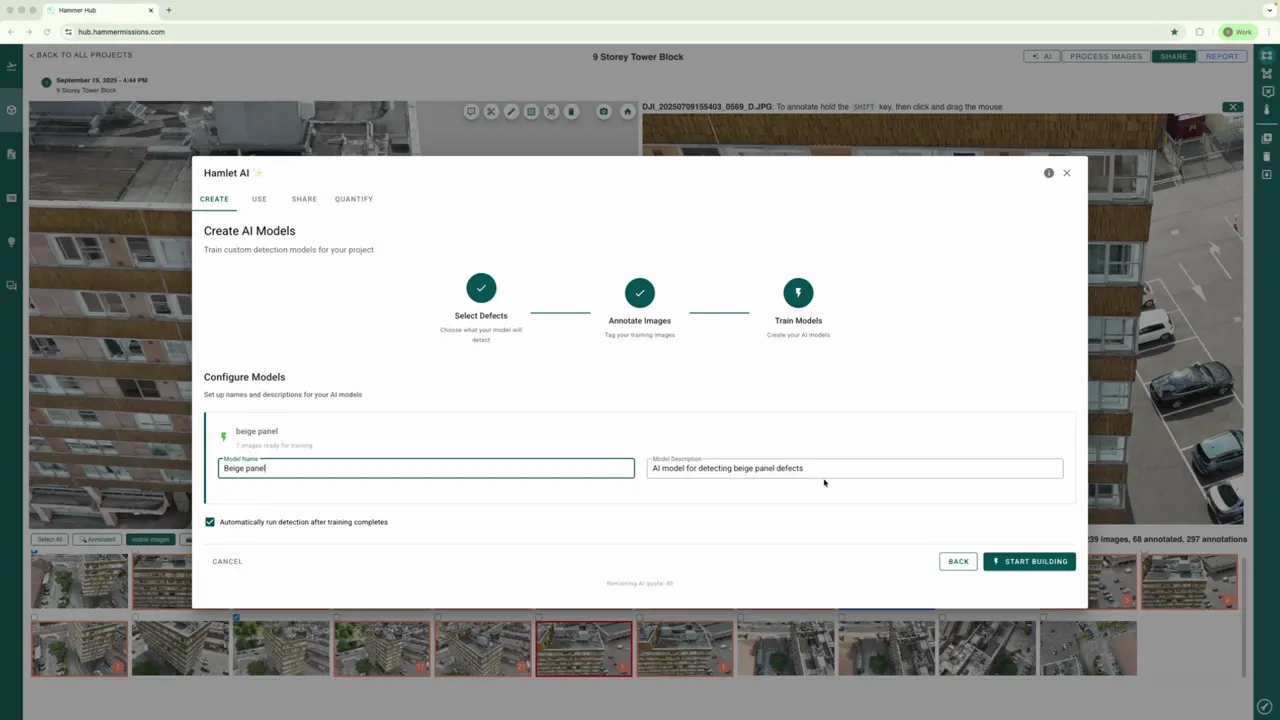
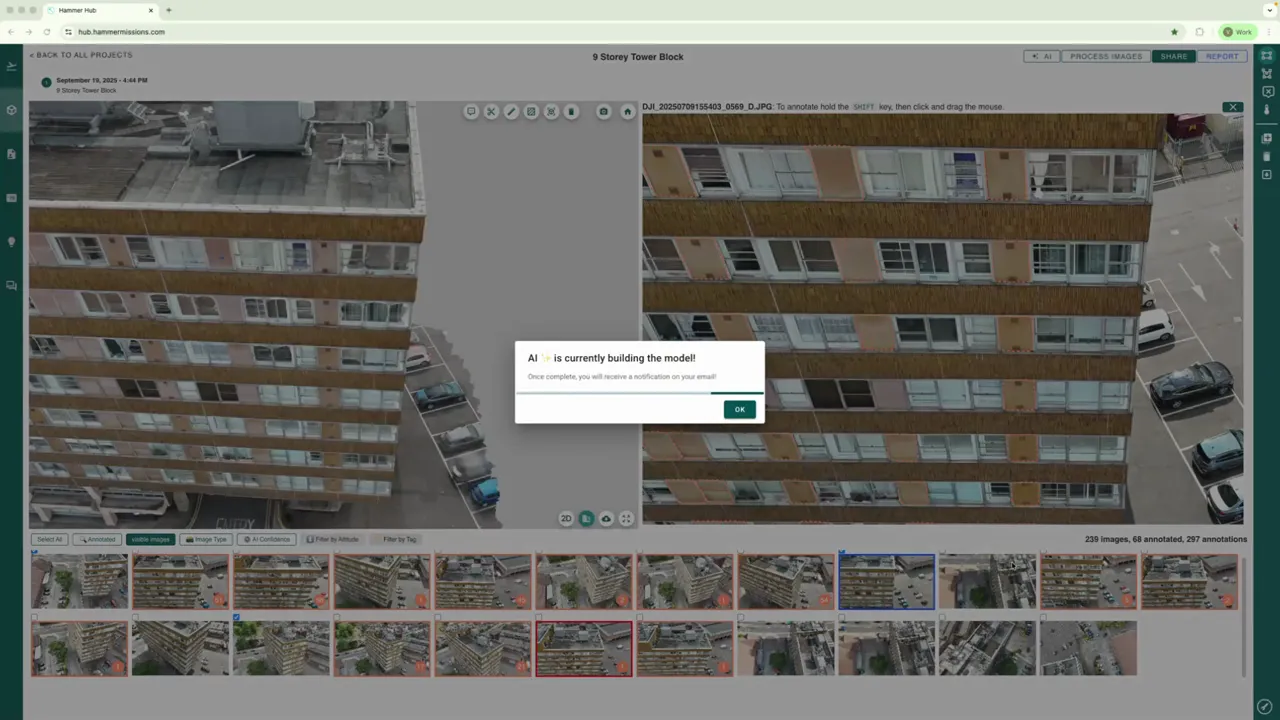
The platform verifies if you have enough annotated images (at least 6). Providing you have annotated 6 or more images, you can then move on to name the model, (add a short optional description if you wish) and click Start building. The platform will build an AI model in the background and then run it across every image in the project to find all matching occurrences.
You will receive an email when the model has finished building. Open the model to inspect the automated detections (you can of course remove any incorrect detections by clicking on their dotted boundary and choosing the delete icon).
Using our platform to build a deficiency specific AI model, quickly turns repetitive visual inspection into a quick, repeatable and scalable process. With consistent annotations and a handful of representative images, you can automate the rapid detection of deficiencies across a whole project and free up time for other key activities.