
Workflows, Best Practice guidance, Tips and Tricks to extract the best from Hammer Missions
In this blog we will walk you through the extra controls which are available in the Hammer Missions flight planning interface. These tools help you edit flight plan missions quickly: deleting or moving items, measuring distances, setting radius-based restrictions, drawing polygons to calculate area, and so on. We also provide you with a convenient link to the Drone Safety Map website where restricted flight areas can be viewed for a number of countries.
All of the additional editing controls live behind the small “magic tool” icon on the right-hand panel. Click that icon to reveal a selection of editing tools. Each tool is designed for a simple, specific task to help you further refine your flight plan mission.
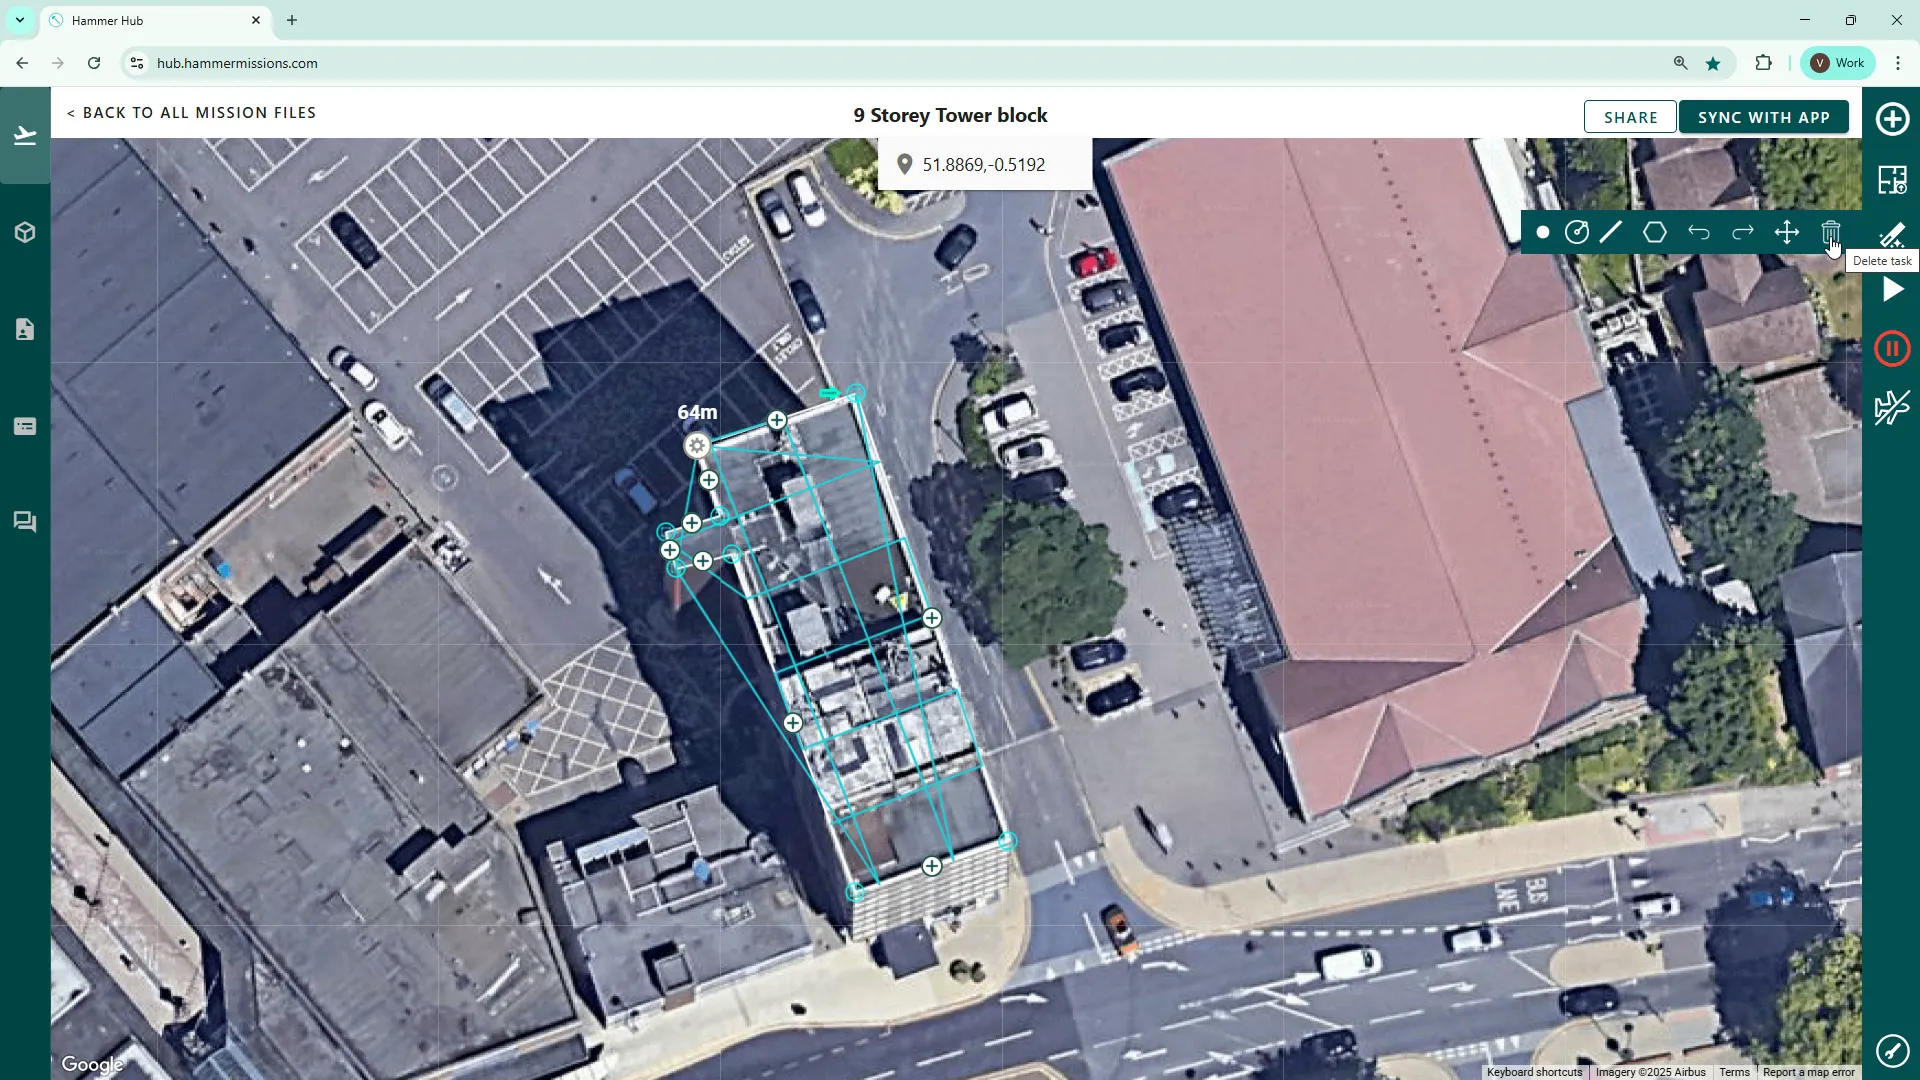
Use the delete (waste bin/trash) icon to remove items from the flight plan. For example, select a mission or point on the map and click the red X to delete it. It’s immediate and removes the selected item from the plan.
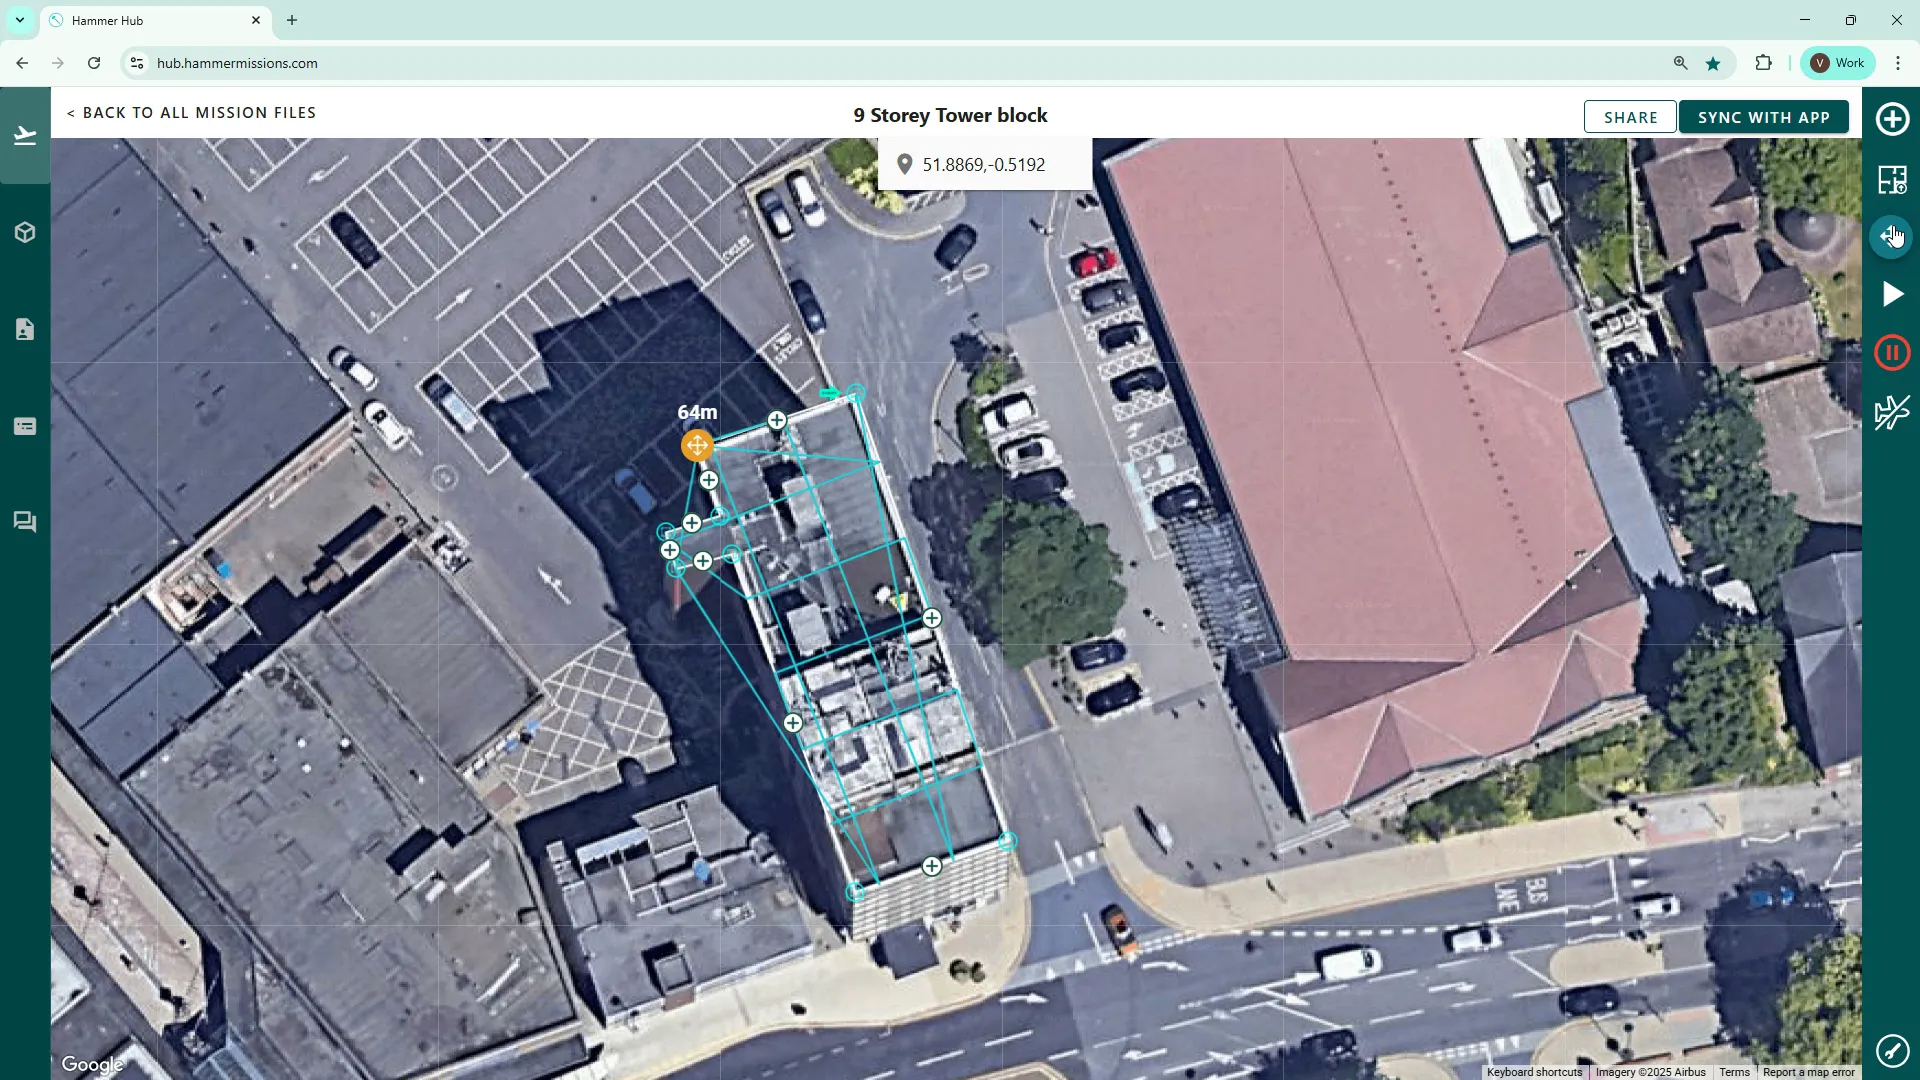
The move tool (four arrows pointing up/down/left/right) lets you drag an entire flight plan around the map — left, right, up or down — to reposition it. Click and drag the mission to the desired location.

If you make a change and need to backtrack, use the undo button to revert the last action. Click undo repeatedly to step back through recent changes; use redo if you want to re-apply an undone change. This is especially useful when adding or deleting points and labels.
To add a point, click on the map where you need it and give it a label — for example, “Car park entrance” or “Floor store”. Labels help when handing off plans to pilots or collaborators, or when exporting the mission for later use.
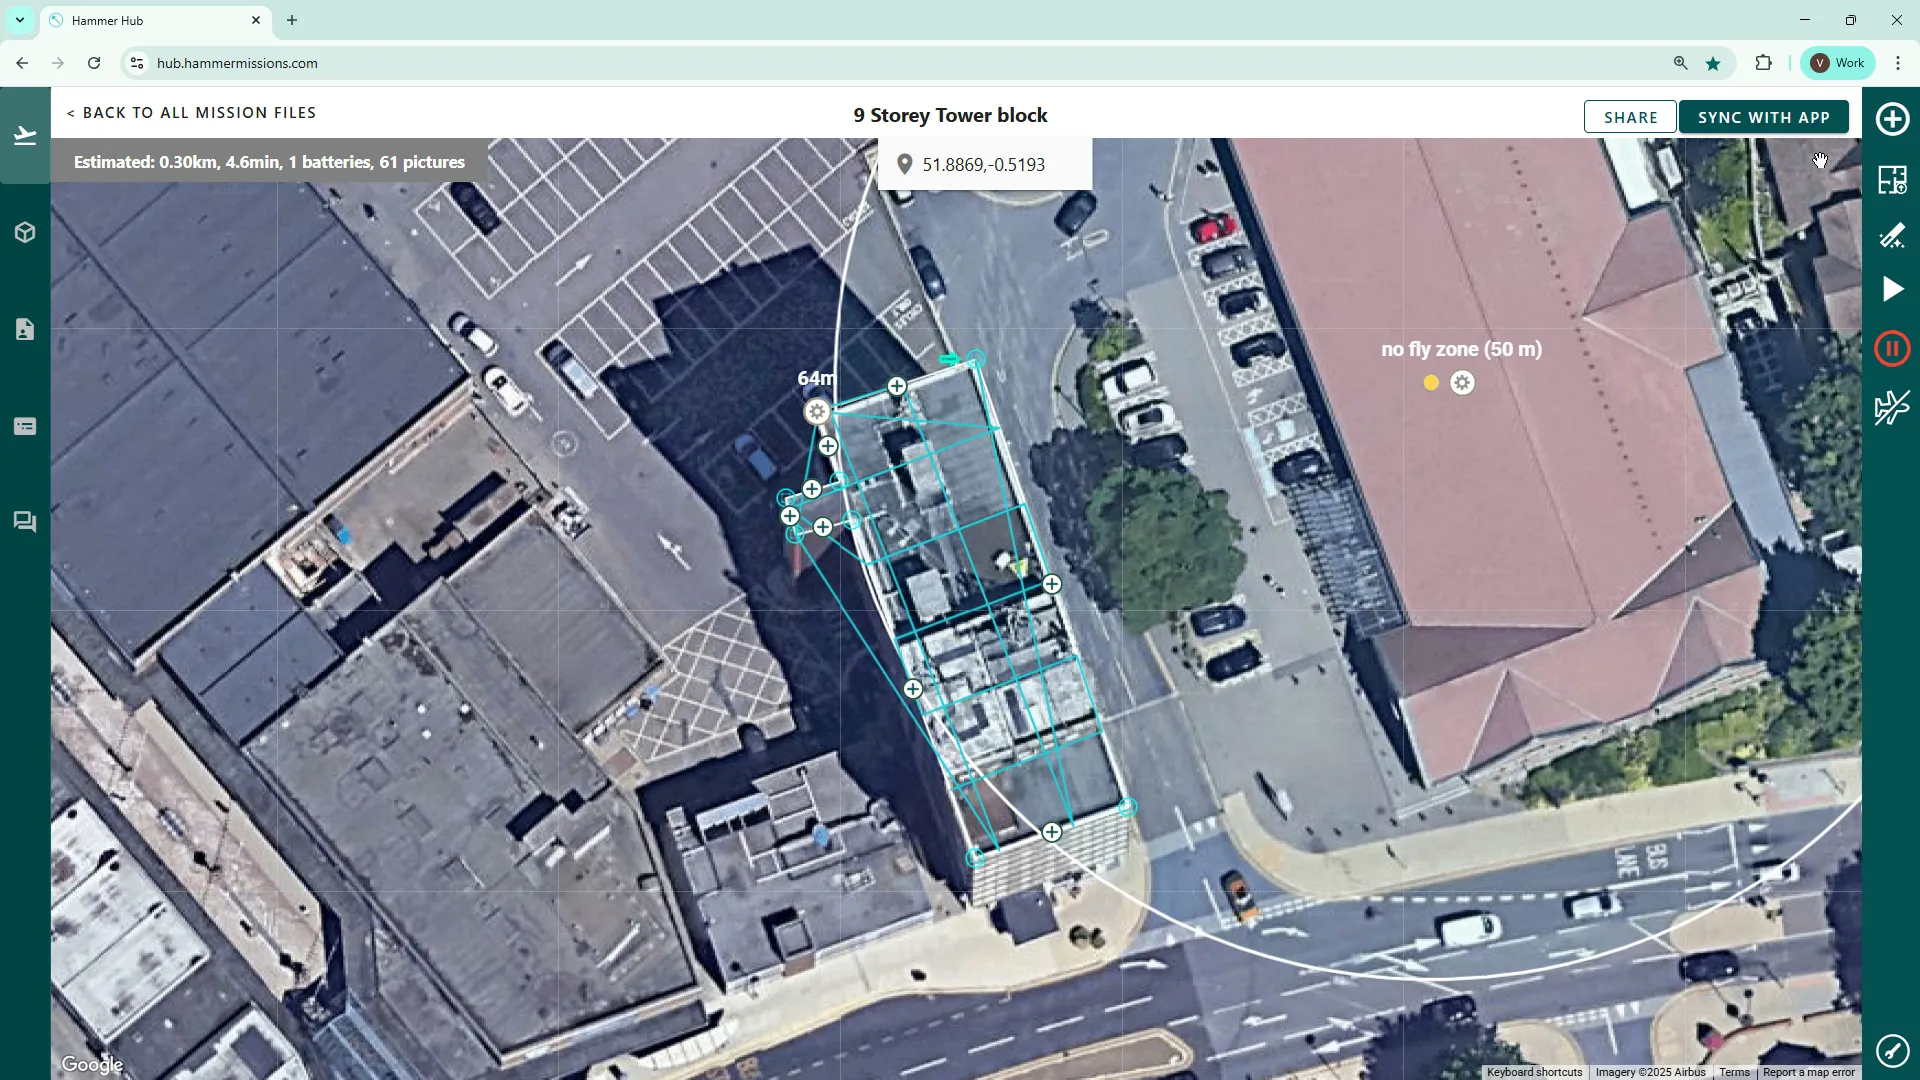
The radius tool lets you place a circular zone with a predefined radius — handy for visually indicating an area you wish to avoid flying into, or perhaps an area-of-interest. Choose the radius (for example, 50 m), select a label such as “No over flight”, and click Done. You can move the circle and edit its size later using the plug/icon edit handle.
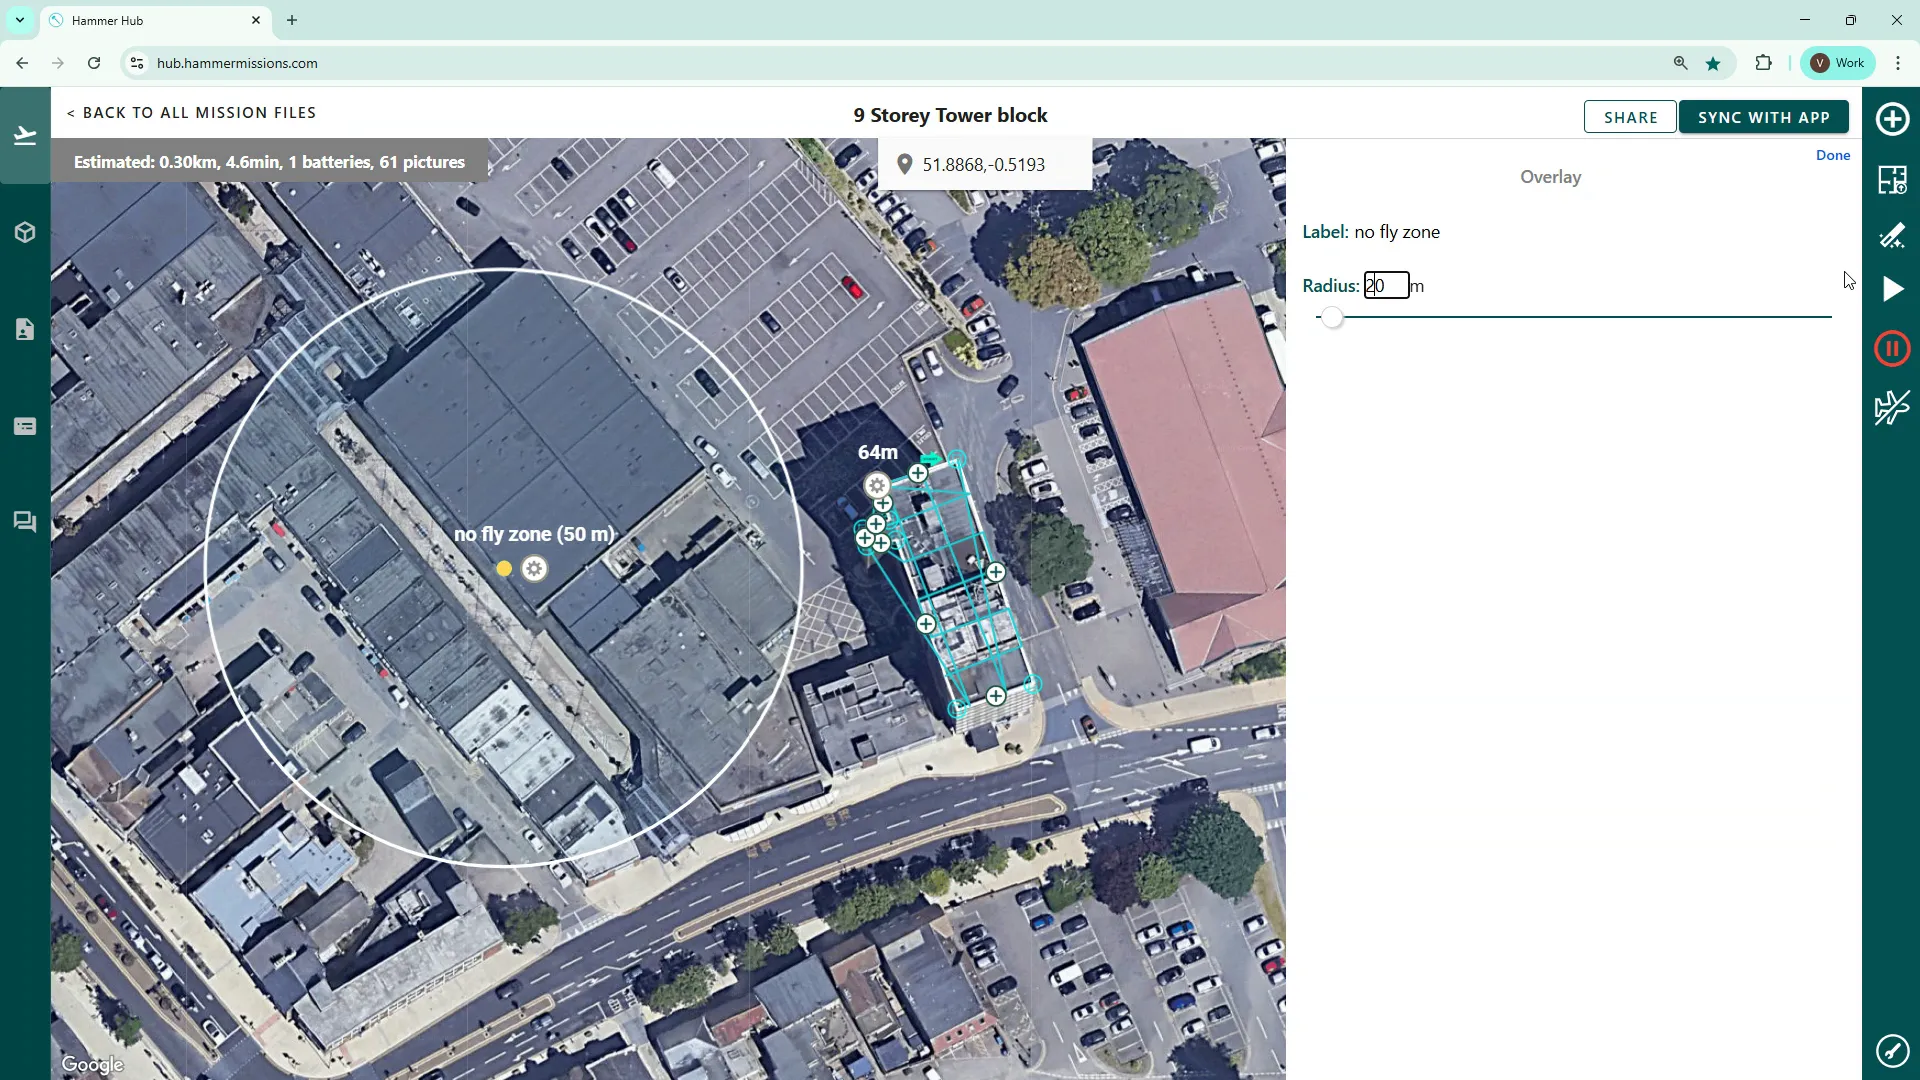
Tip: use smaller radii for precise restrictions (e.g. 20 m) and larger radii for broader safety buffers around sensitive infrastructure.
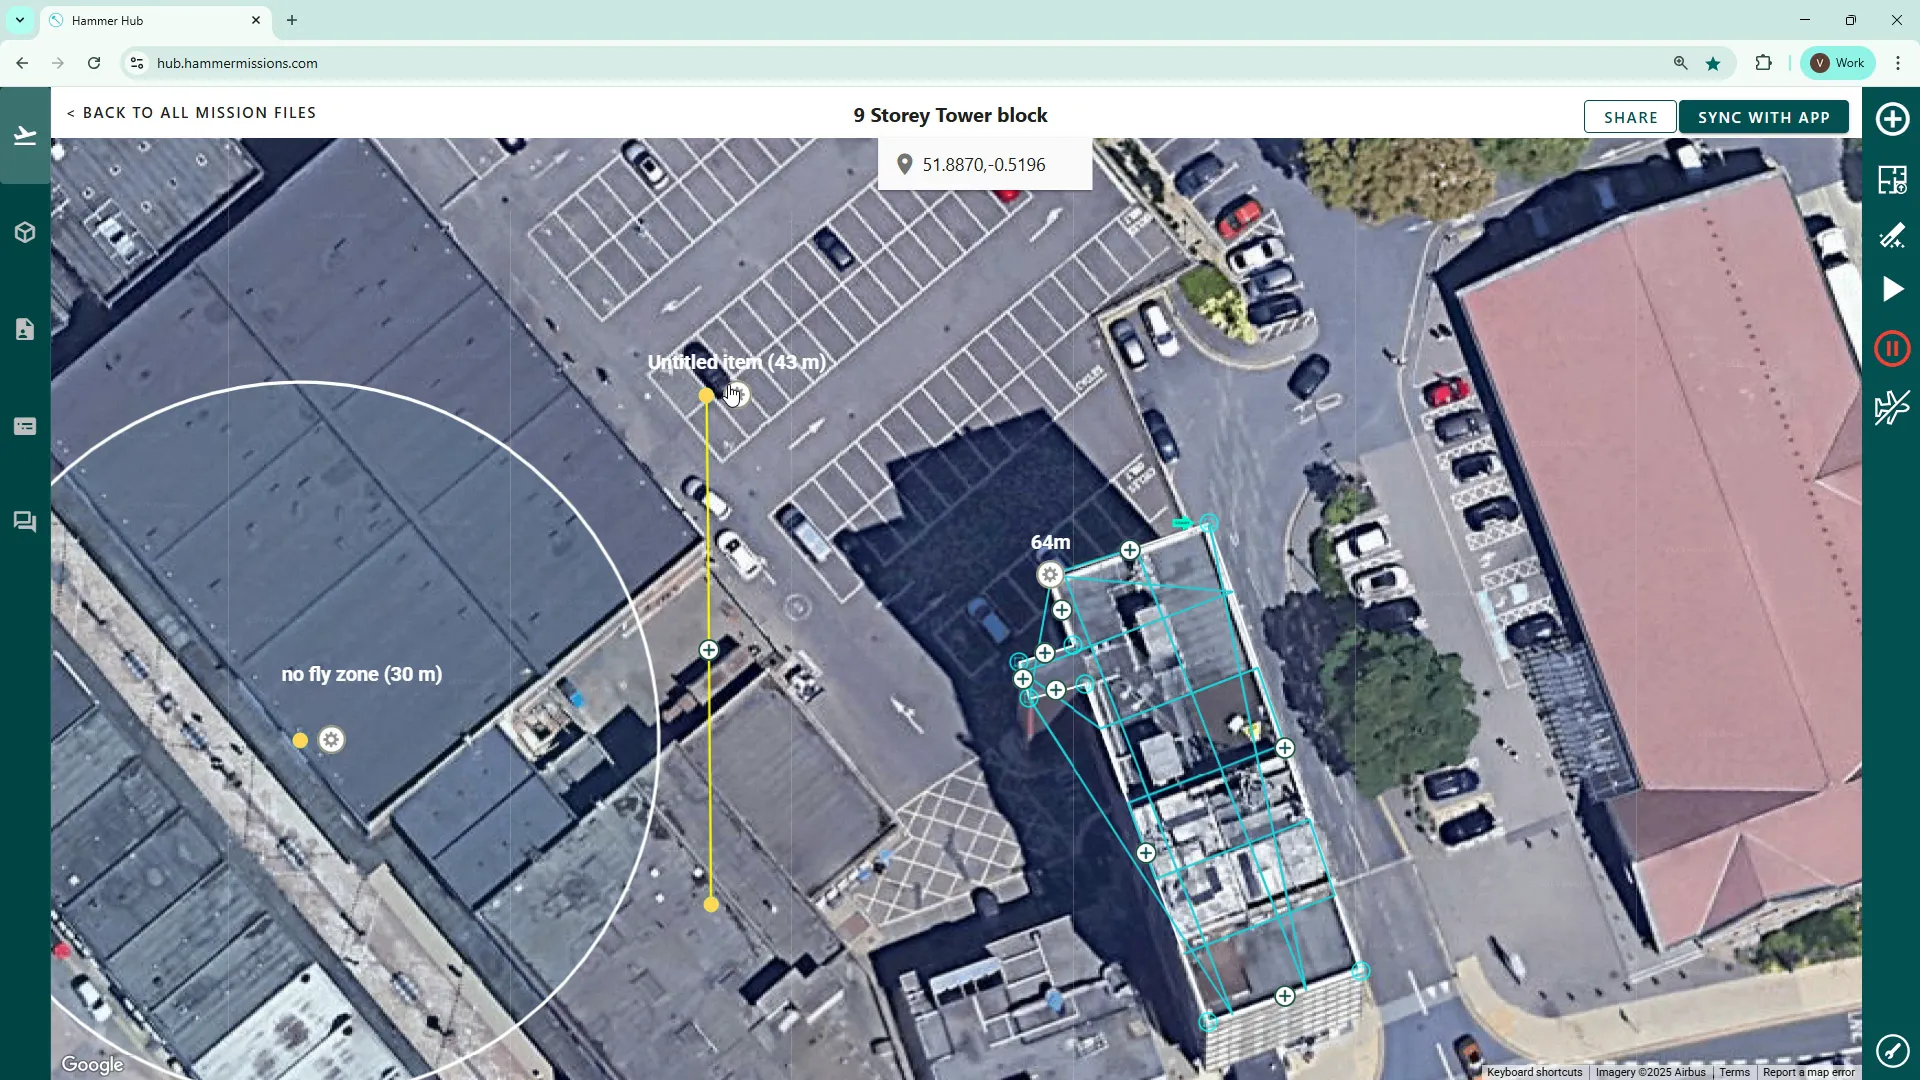
The measurement tool allows you to draw a straight line between two map points and shows the exact distance. Name the line if you want (for documentation or sharing) and use the measurement as part of your safety assessment or flight planning calculations.
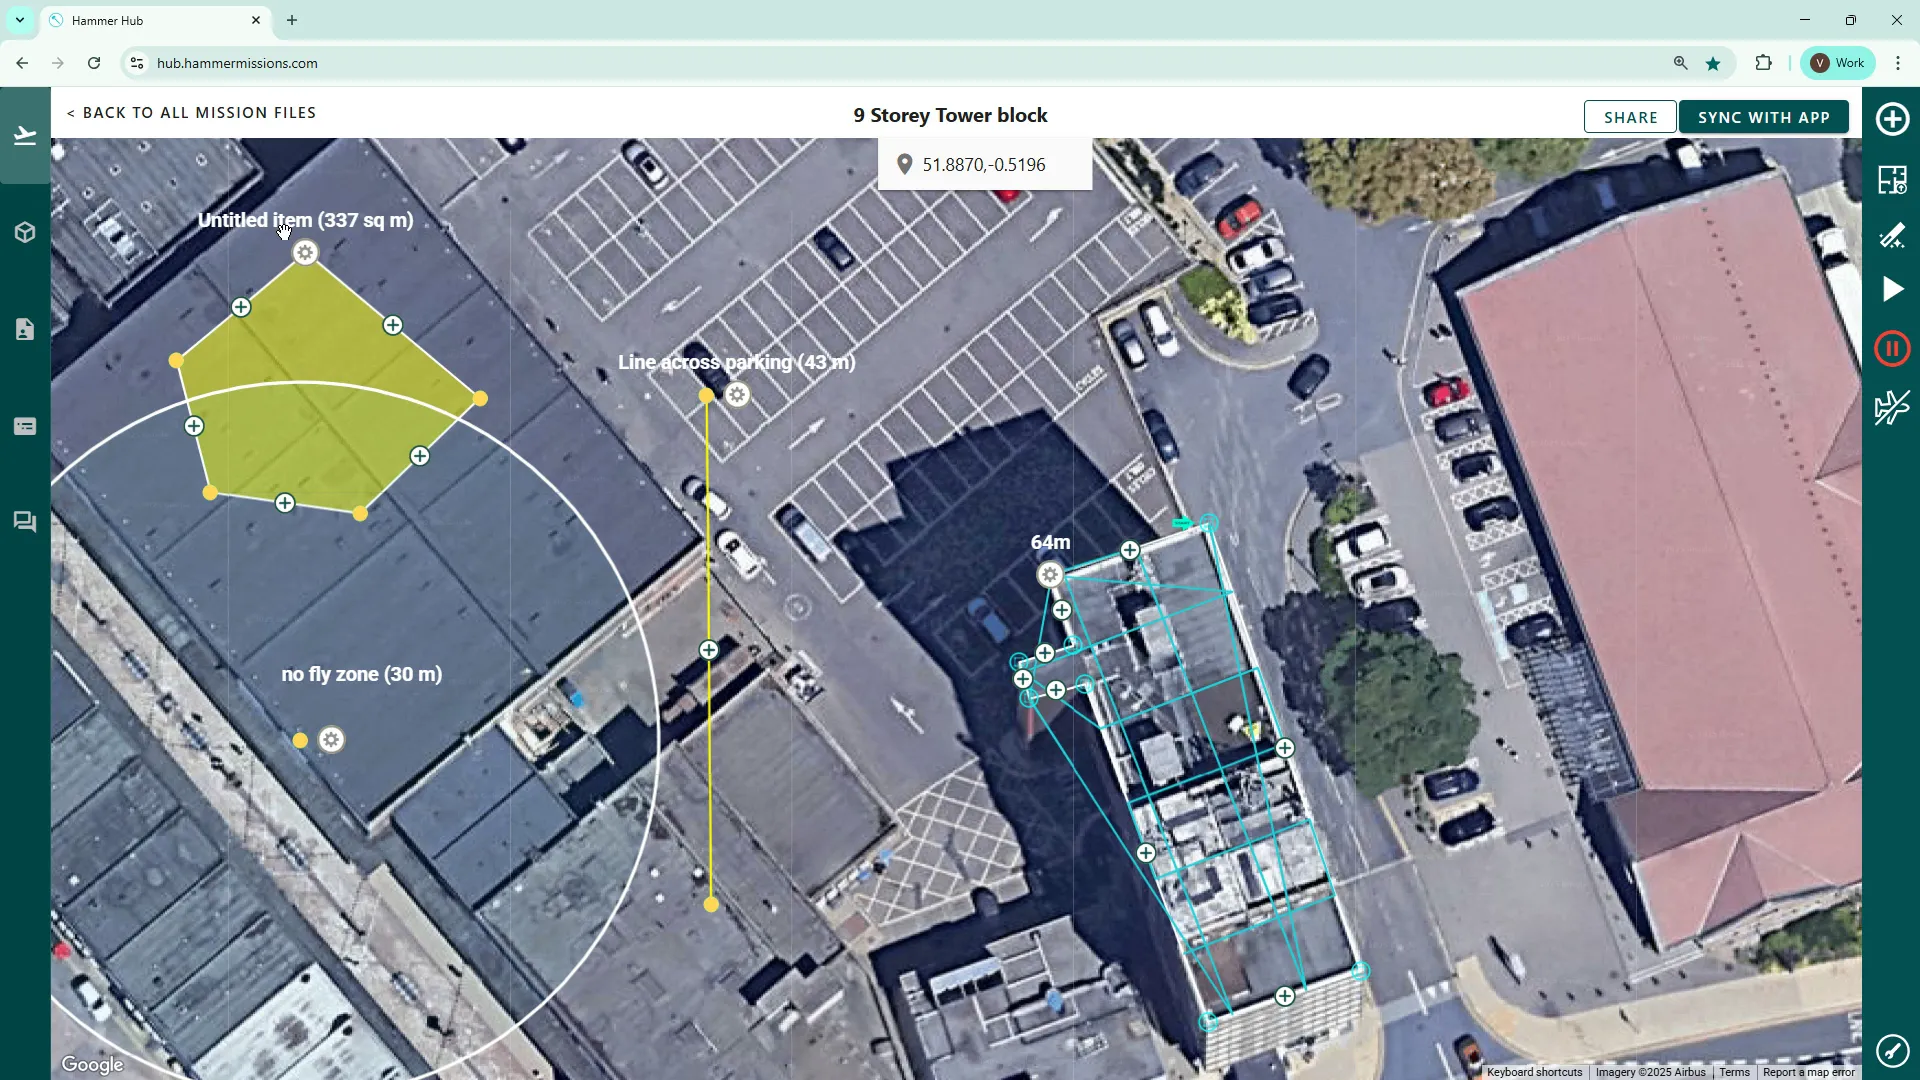
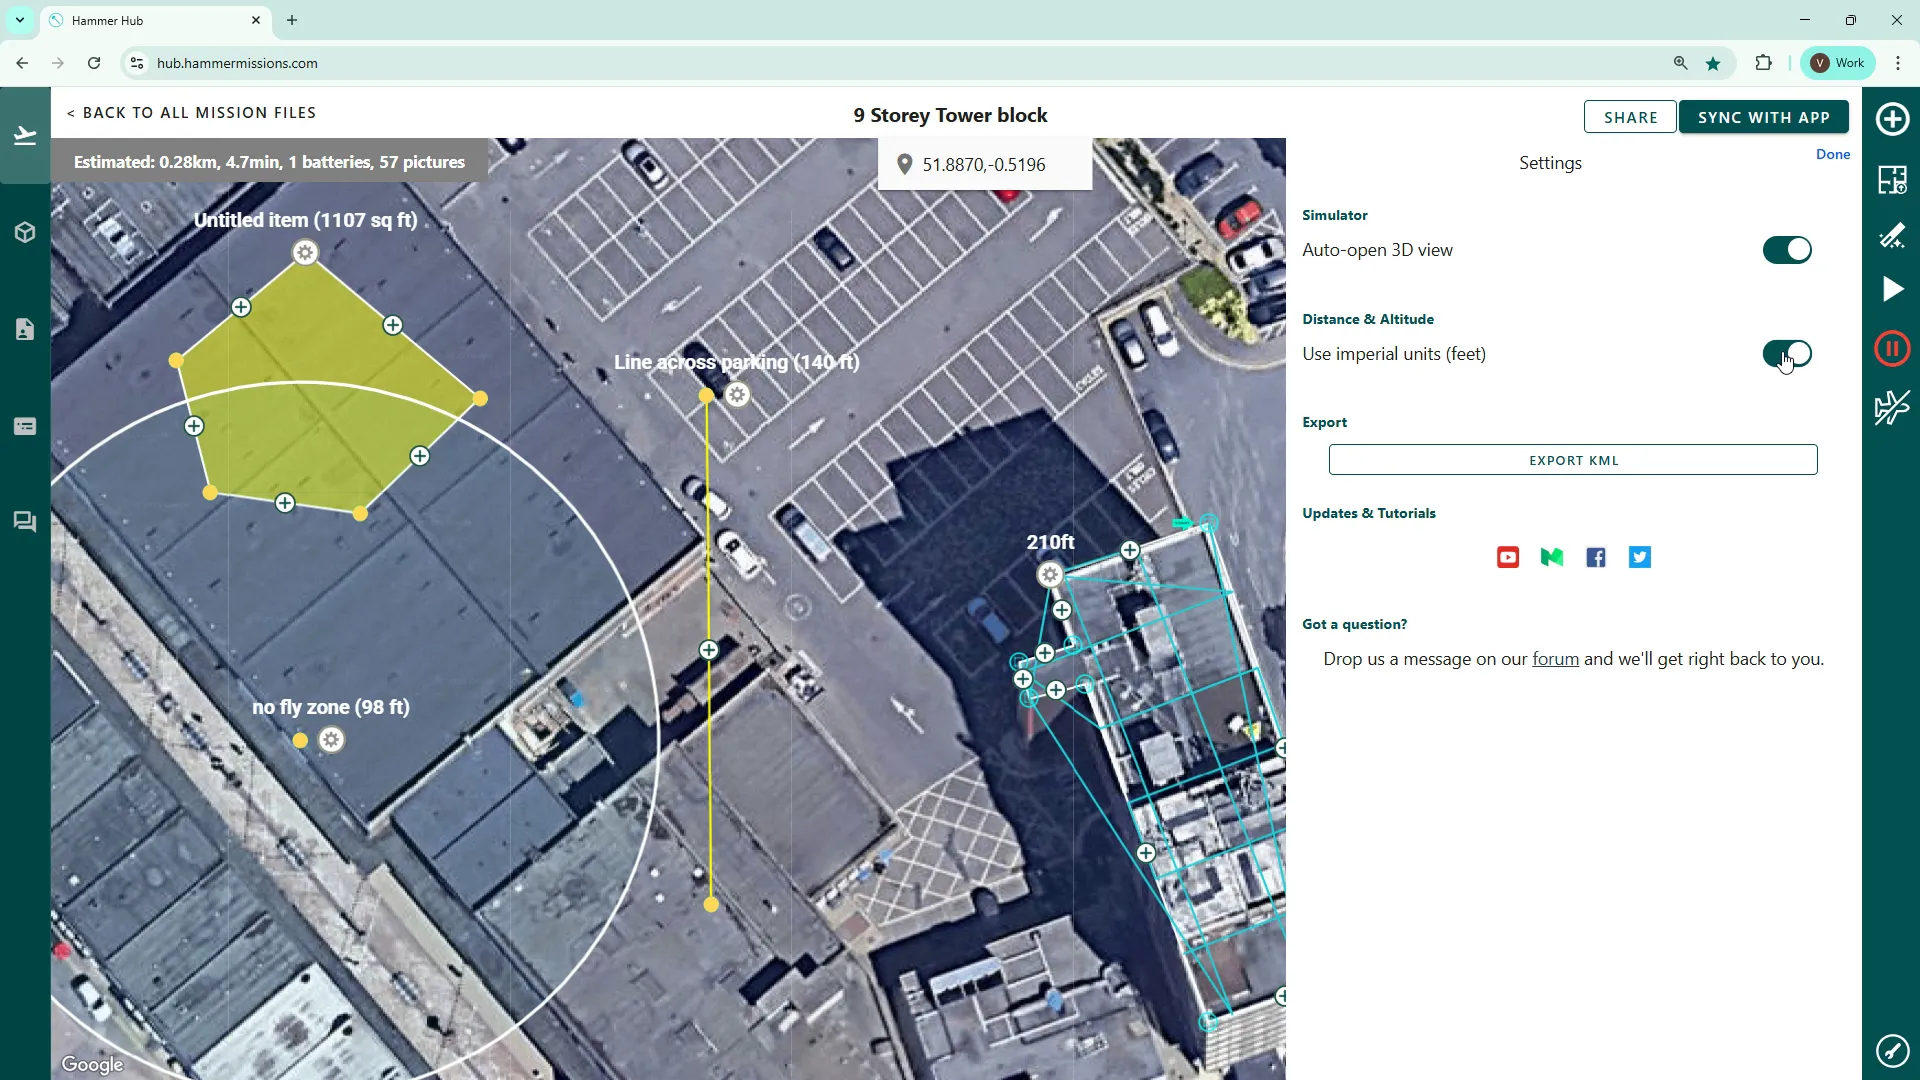
Use the polygon tool to outline an area on the map. Once complete, the tool shows the total area — expressed in square metres or square feet depending on your settings — making it easy to estimate coverage, ground footprint or mission extents.
At the bottom of the tools panel you’ll find useful global settings and utilities:
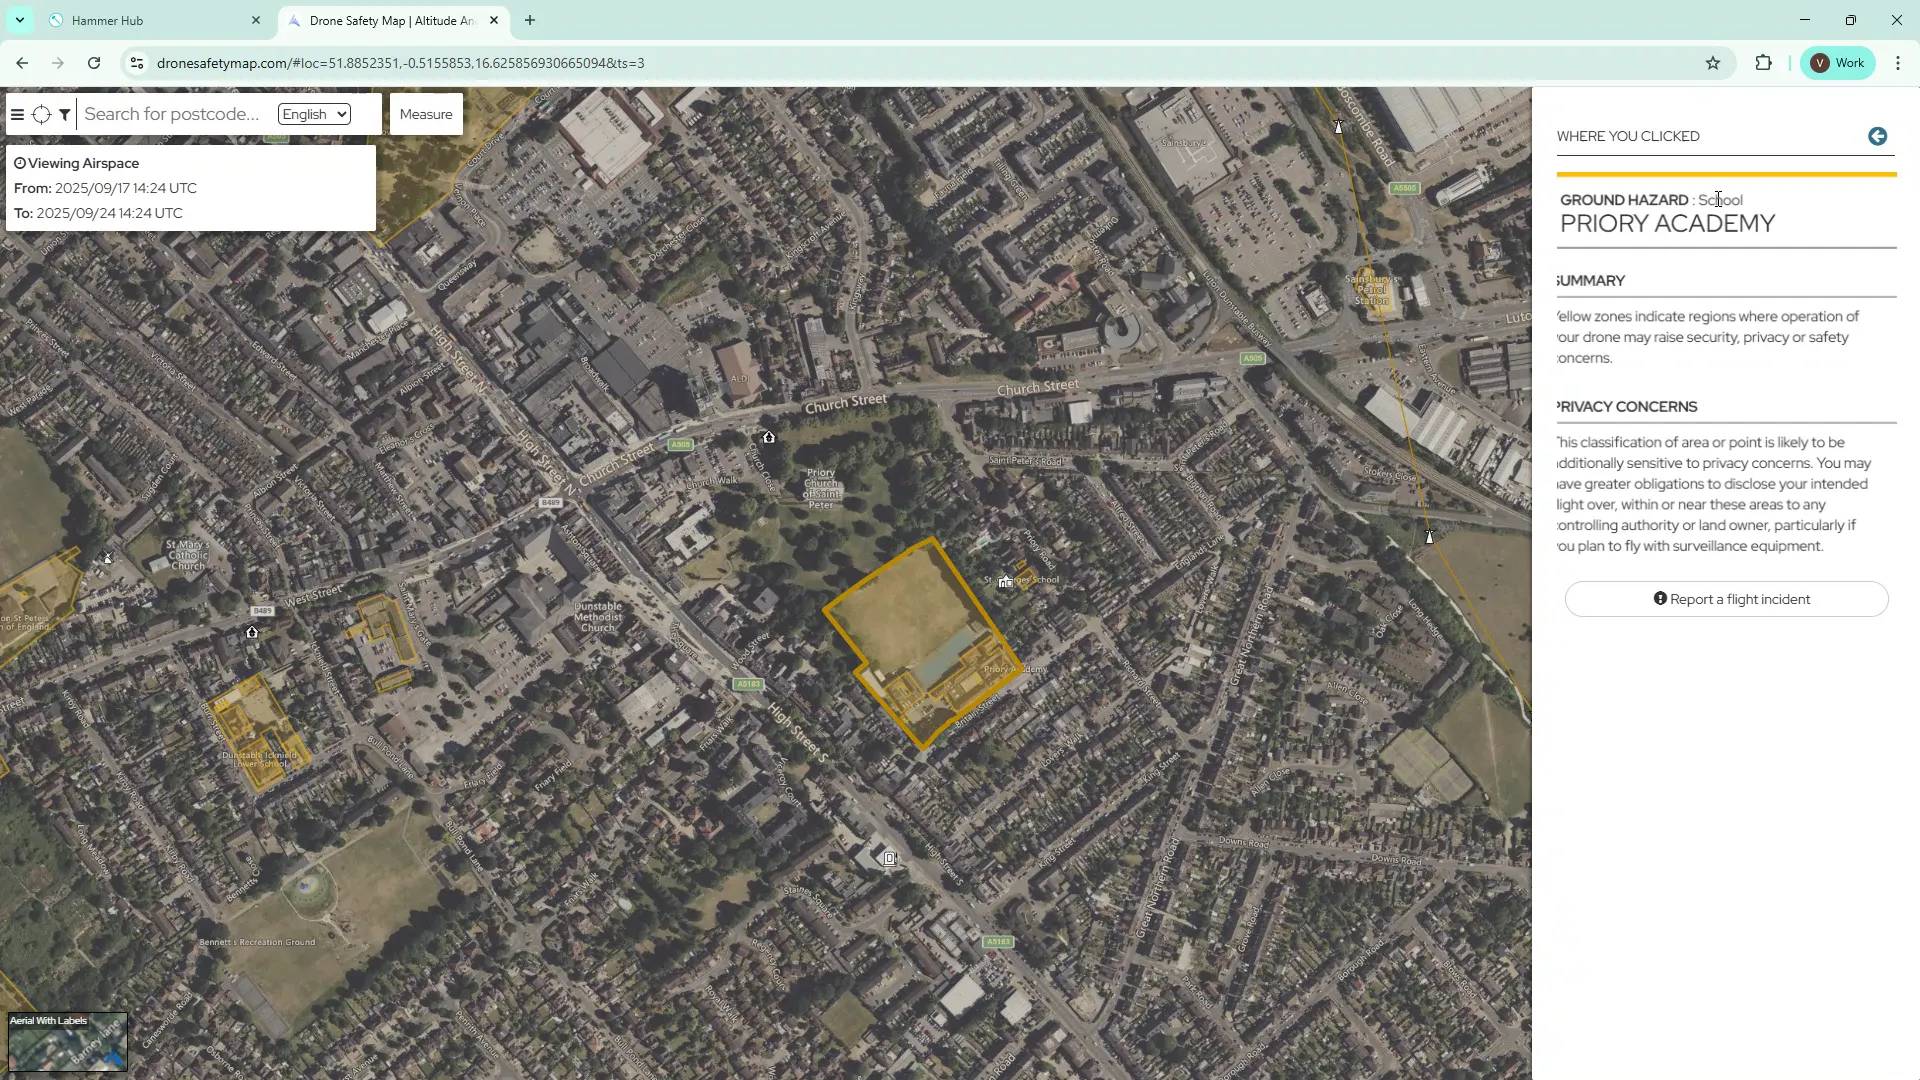
From the tools, you can open the Drone Safety Map overlay. This layer shows no-fly and restricted zones, and identifies sensitive locations (such as schools or academies). It’s particularly useful for European operators, where the overlay is fully integrated and kept up to date for many jurisdictions.
The overlay also highlights airport flight protection zones in red. Always cross-check these zones when planning near aerodromes — they may impose altitude limits, require permissions, or prohibit flights altogether inside the marked boundaries.
These additional tools make mission editing faster, clearer and safer. Whether you’re refining a roof inspection flight, drawing a buffer around a sensitive site, or exporting plans for collaborators, the Hammer Missions mission editing suite gives you the building blocks to create reliable, compliant missions.
Try the tools in your next plan: label points clearly, use radius and polygon features to manage risk, and in countries where applicable, consider using the Drone Safety Map option to check your flight area before flying.
Layered Folders (Mission Planning)