Workflows, Best Practice guidance, Tips and Tricks to extract the best from Hammer Missions
When a survey or scan is complete, the next step is often to share that model with designers, contractors, or other teams using BIM or CAD tools. Exporting from Hammer Missions lets your Hammer Missions models in commonly used formats, which those tools should accept. This makes collaboration smoother and reduces rework caused by incompatible file types.
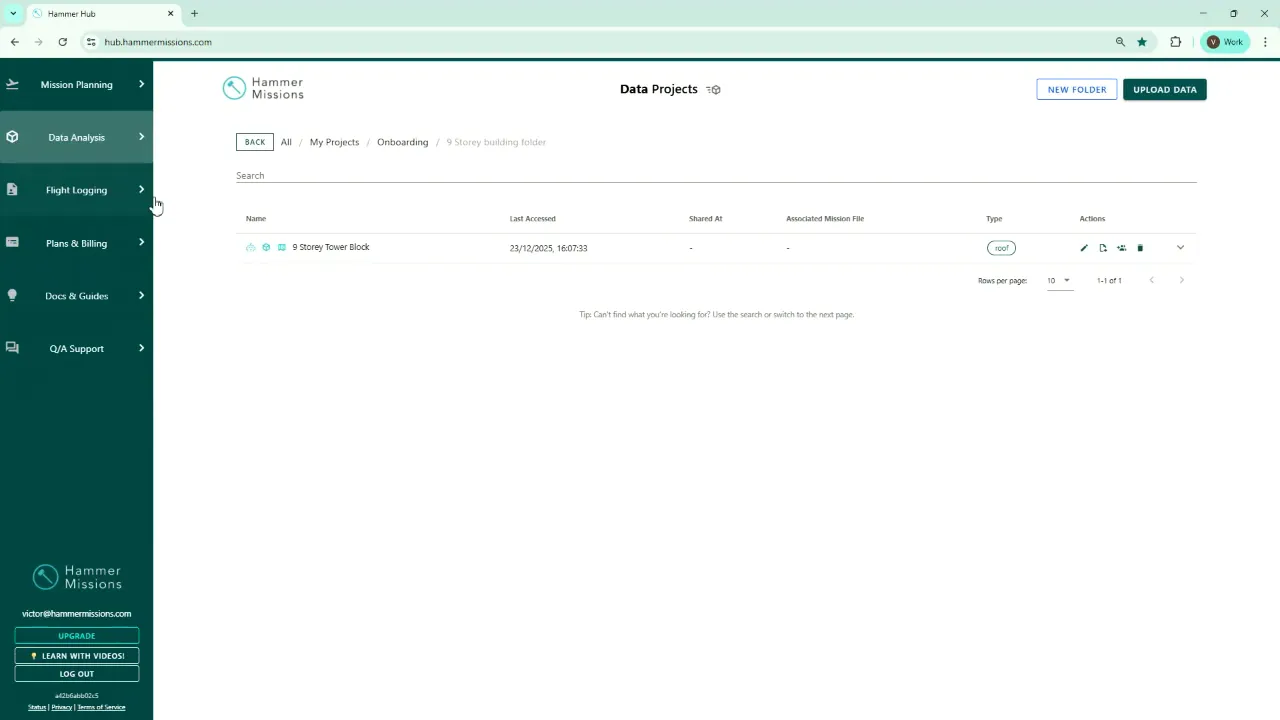
Open the project you want to export from the Hammer Hub and navigate to the project data analysis area.
Open the project
Find the project in Project Data Analysis and open it so the model and associated tools load in the viewer.
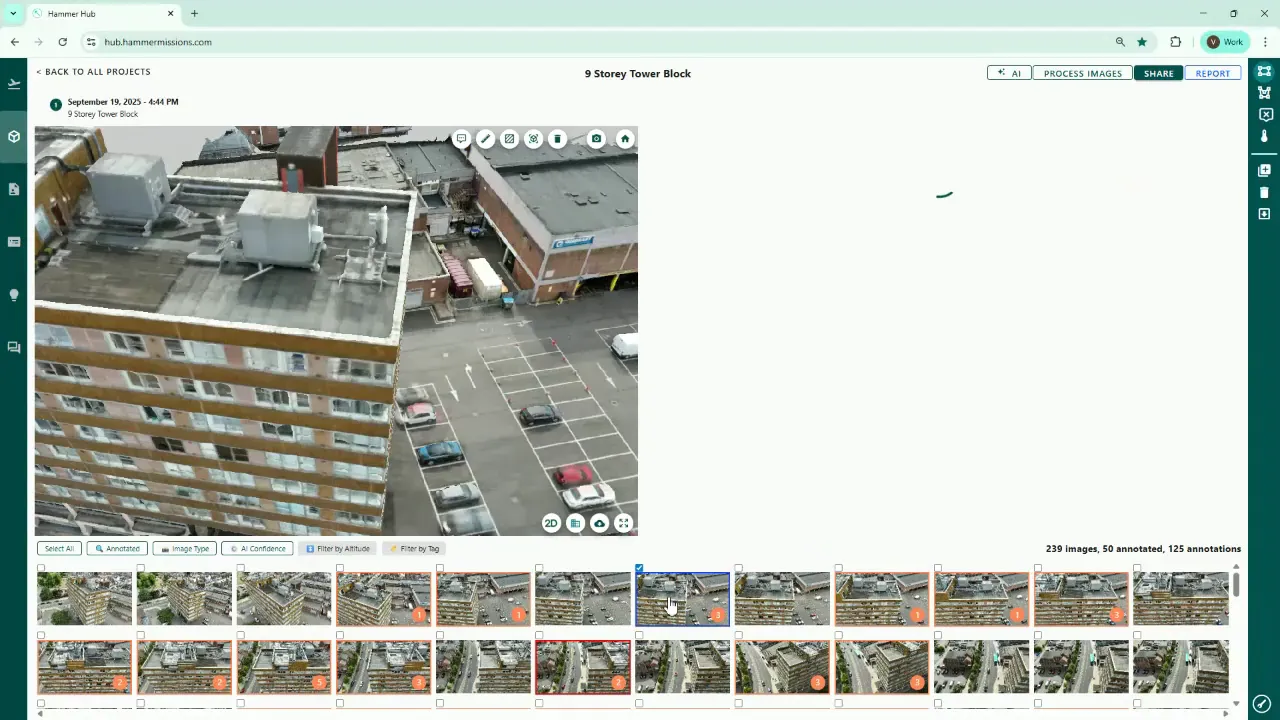
Locate the export control
The export control is positioned below the 3D model in the standard view. If you use split screen, you will find the same control on the left side of the split view.
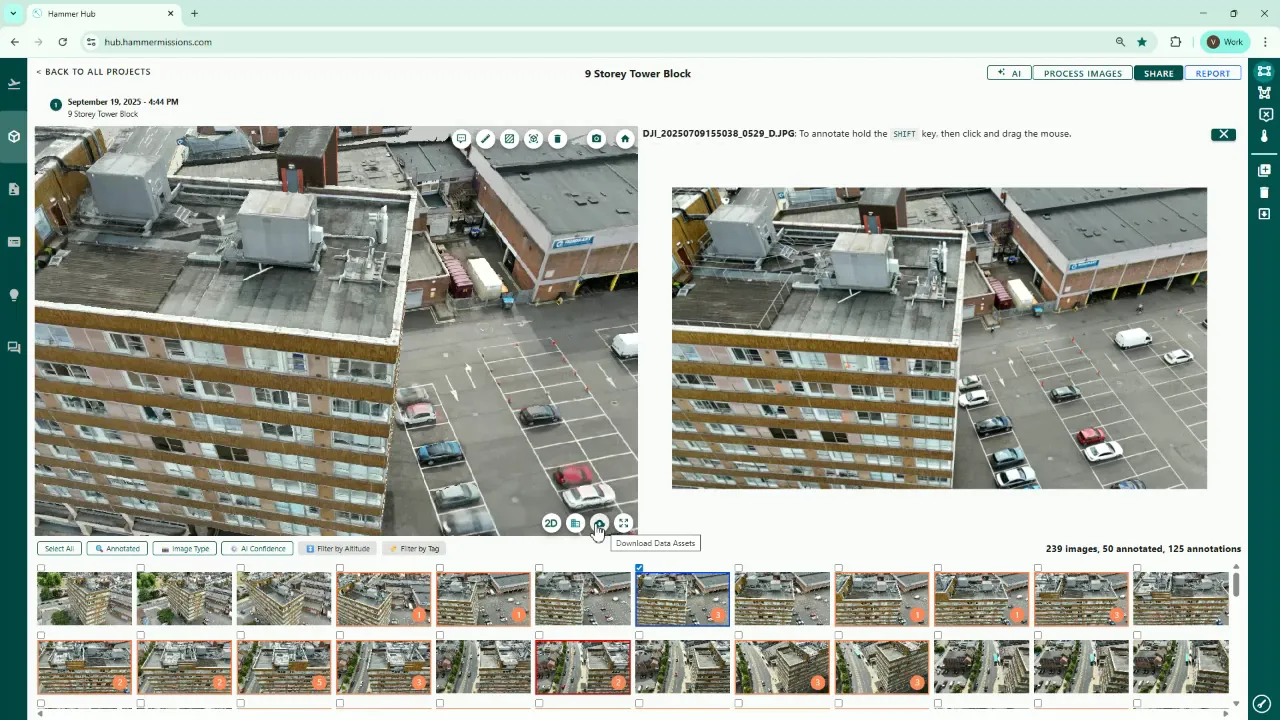
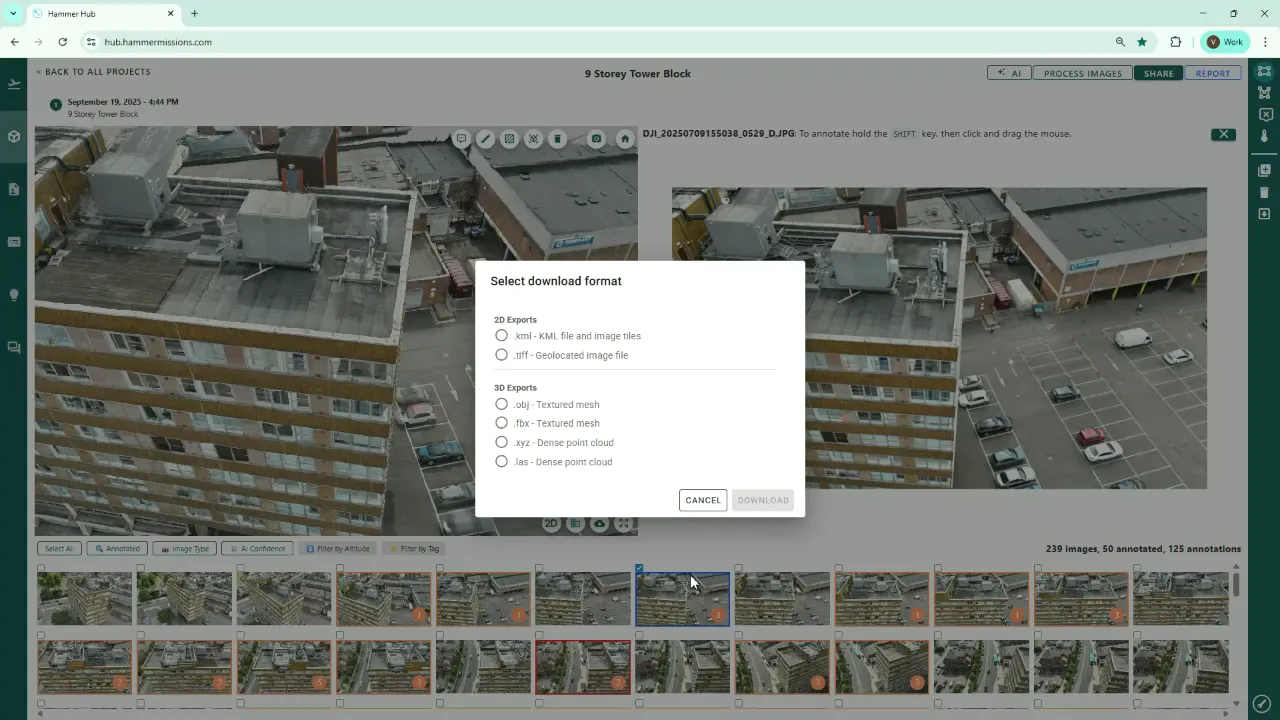
Choose Download Data Assets
Select the Download Data Assets option to reveal the available export formats and asset types.
See the list of available export options.
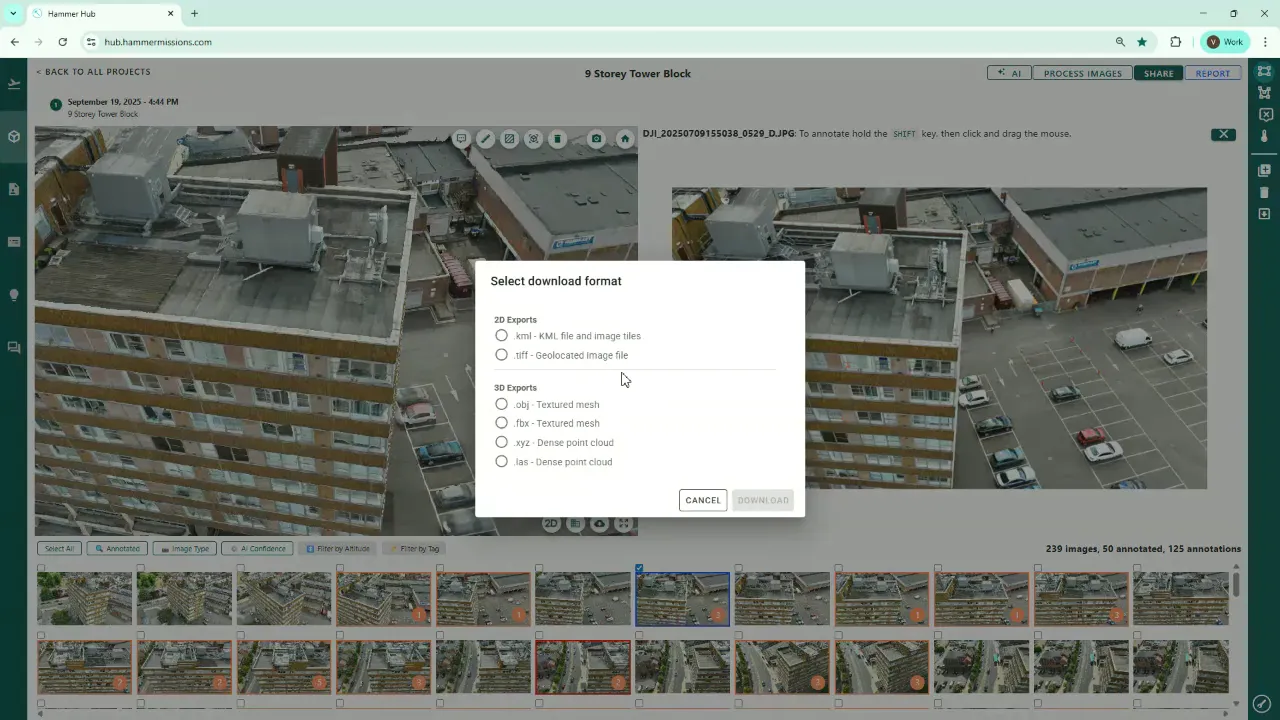
Select an export format
Hammer Missions provides six different export types covering both 2D and 3D needs. These outputs let you export your model data in a format for import into BIM, CAD or other similar visualisation packages.
Download and verify
After exporting, you can transfer the file to the other party for import into their platform.
Exporting from Hammer Missions is a simple, repeatable process accessed via the Project Data Analysis area. The Download Data Assets control exposes six export types that cover common 2D and 3D needs, enabling direct handoff to BIM, CAD and visualisation workflows. With a quick verification and consistent naming, exported assets can be shared confidently across teams and partners.
Thermal Scaling and Tuning Workflows